Showing posts with label recipe. Show all posts

Tuesday, June 4, 2013

Whole Grain Egg-Free Pancakes + Freezer Tips

After we discovered Ava's egg allergy, I started experimenting with egg-free cooking and baking. I found a recipe for whole grain pancakes and have adapted it for her allergy and it's fantastic! I made a double batch last weekend for breakfast and to freeze. On Thursdays, Ava's school serves pancakes for breakfast. Aaron liked them too! I keep egg-free muffins, pancakes, waffles, and french toast to bring to Ava's school so she can participate in the meals without causing an allergic reaction. Since she sees her friends eating pancakes too, it's nice that she has some that are tasty and egg-free.

So far, I've made these pancakes with cooked millet or oats. We like them both ways. I cook the whole grain on the stove ahead of time and set them aside for making the pancakes when we're ready.

Step 1: (Make-ahead) cook whole grain - I like to use old fashion oats or millet. Store in the refrigerator or puree and store until ready to make pancakes.

Puree the whole grain (millet)
Step 2: (Make-ahead) Puree whole grain 1 cup + 1/2 cup water. Blend to desired consistency (you don't have to do this step, but the texture might be off for kids if you don't). Store in the refrigerator.

Step 3: Make batter and cook pancakes on the griddle. Serve and save the rest for freezing. Let pancakes cool completely and store between wax paper in labeled freezer bags.

Step 4: Reheat. Remove frozen individual pancake. Put on a microwave safe plate. I usually set this out about 30-45 minutes before we leave the house. I microwave the pancake for about 45 seconds on 70% and put int a container to bring to Ava's school. Ava likes to eat the pancakes cold, biting it like a sandwich. Very easy!


Whole Grain Egg-Free Pancakes
Makes 6 small pancakes


Ingredients:
  • 1 cup cooked whole grain (millet, oats, quinoa) + 1/4 cup water, pureed in blender
  • 3/4 cup flour (1/2 cup whole wheat 1/4 cup all purpose)
  • 2 tsp baking powder
  • 1/4 tsp salt 
  • Egg Replacer (equivalent of 1 egg) - can buy at Kroger, Whole Foods, or Amazon
  • 1 tbs butter, melted
  • 1/2 cup milk (buttermilk, regular, almond/soy milk)
  • 2 tbs maple syrup

Egg Replacer is mixed
Directions
  1. In a medium bowl, mix together pureed grain, flour, baking powder, and salt. In another medium bowl, whisk together prepared Egg Replacer, butter, milk, and syrup until smooth. Add egg mixture to flour mixture and whisk to combine.
  2. Lightly coat a large nonstick skillet or griddle with butter and heat over medium-high. Drop batter by heaping tablespoonfuls into skillet. Cook until bubbles appear on top, 2 minutes.
  3. Flip cakes and cook until golden brown on underside, 2 minutes. Wipe skillet clean and repeat with more melted butter and remaining batter (reduce heat to medium if overbrowning). Serve with maple syrup and fresh fruit or preserves if desired.
Pancakes are cooking!

Thursday, May 30, 2013

Fava Bean Pesto Pasta with Chicken

All packed up for lunches!
We got fava beans in our produce bin a couple weeks ago and I had no clue how to prepare them. So I did some initial research. GreenBean Delivery shared a recipe on their blog for a Spring pasta with fava beans, which sounded great. Other options were making them into falafel, purees for side dishes, and soups. I parboiled the shelled beans I cooked them too long which made them mushy. That means I had to puree the beans. I found a recipe for Fava Bean Pesto from Cat Cora on The Food Network and decided to give it a try. I had lots of basil at home, which make it easy to make with what I had on-hand. Ava really likes spaghetti so I was hoping she would like it too. It turned out great and Aaron told me that he really liked it!

I made a few modifications to the Fava Bean Pesto recipe. Instead of using it on bread as a sandwich, I used it as a sauce for spaghetti pasta. We ended up with an easy, healthy, and affordable meal! 
  • Add pesto to 1/2 pound of spaghetti (reserve 1/2 cup of pasta water)
  • Omitted mint and added extra basil
  • Used 1/2 cup of olive oil instead of 1 cup 
  • Didn't add in Parmesan cheese to the pesto (instead topped some on the finished pasta). This helped lighten the pasta without compromising flavor.
I served it with broiled, seasoned chicken and steamed green beans. We cooked two chicken breasts and sliced them into strips after they were cooked. Since fava beans are rich in protein and fiber you don't need much additional meat. The entire meal stretched to 5 meals. So I packed up the three portions for lunches!

To make all this happen on a busy weeknight. I used these make-ahead steps.
  • Step 1: Shell fava beans and parboil. Let cool and it will be easier to remove from additional covering on the bean. I did this on the weekend.
  • Step 2 - Night before: If using frozen chicken defrost two breasts in the refrigerator or in cold water. Process the pesto sauce. It will be thick. 
  • Step 3: Cook spaghetti and reserve 1/2 cup of pasta water to thin out pesto. Grill or broil chicken breasts. Stir in prepared fava bean pesto sauce to cooked pasta, adding reserved pasta water 1 tablespoon at a time until you have your desired consistency. Slice chicken breasts. Serve with grilled or steamed veggies or a green salad. 
Enjoy! I will definitely make this again!

Saturday, January 12, 2013

Freezer Meal: Beef and Quinoa Meatballs, Homemade Spaghetti Sauce, and Pumpkin Spice Mini Cheesecakes

Meat Balls cook quickly in the oven. They were fantastic!

My October meal got really good reviews by the families in my freezer meal exchange group so I thought I would share it! The meatballs were very flavorful and great for kids because they contain shredded zucchini and carrots along with a whole grain. I made 6 whole meals so I bought 5 pounds of ground beef and cooked about 2 cups of dry quinoa to make the meatballs.

The spaghetti sauce was fabulous! The recipe made enough for all 6 of my meals so you can make the entire recipe for many meals for your own family or to share.

With the exception of casseroles, when our meals involve pasta we provide dry pasta since it doesn't freeze well. This meal was very easy to reheat and serve to our family on a busy weeknight. I usually plan on Monday nights as our freezer meal night of the week and sometimes we make two freezer meals depending on how many we have on-hand.

Read below for the menu and tips for freezing and reheating!
Meal exchange day!

Freezer Meal Menu: Serves 5
Quinoa and Beef Meatballs, spotted this in a Whole Foods email newsletter
Homemade Spaghetti Sauce, from the LLL Whole Foods for the Whole Family cookbook
Dry Spaghetti, cook when ready to serve
Frozen Peas (store bought)
Pumpkin Spice Mini Cheesecakes, made individual sizes in muffin tins and used graham cracker crust recipe from Better Homes cookbook. *I used roasted butternut squash instead of canned pumpkin. You can use any winter squash that you have on-hand.


Very Tasty Spaghetti Sauce (25 servings Large Quantity for Feast or Freezer) --I made 1 batch for 6 meals. Need a 10 qt saucepan or 2 pans.
  • 6 onions, chopped
  • 2 green bell peppers chopped
  • 2 cups chopped celery
  • 8 oz fresh mushrooms (I omitted)
  • 1/4 cup olive oil
  • 12 cloves garlic, chopped
  • 2 lbs ground beef (I omitted because I made meat balls - see recipe above)
  • 7lbs fresh or canned tomatoes
  • 26oz tomato paste
  • 48oz tomato juice
  • 2-3 tbs dried oregano
  • 4 tsp dired basil
  • 4 bay leaves
  • Dash of pepper
  • 2 tsp sea salt
  • 3 tbs flour

Saute onions, green peppers, celery and mushrooms in olive oil in a 10qt saucepan over medium heat until tender. Add garlic. Saute for several minutes; remove vegetables to a bowl. Add ground beef to drippings in pan. Cook until brown. Add sauteed vegatables and add the next 8 ingredients; mix well. Bring to a boil, reduce to a heat. Simmer uncovered for 1 hour. Discard tomato cores and bay leaves. Mix 1 cup of the sauce with flour. Stir into saucepan. Cook until thickened, stirring frequently. Freeze in needed quantities for later use. May add chopped green chiles to taste.

Freezer Prep Tips:
  • Label freezer bags with printed labels or hand write with a Sharpie pen before you fill them. Make sure to include name, date, and any specific information such as reheating instructions. 
  • Let meatballs and sauce cool completely. I portioned 20 meatballs per meal. Package meatballs with spaghetti sauce in 1-gallon freezer ziploc bag. Make sure air is completely out of the bags before sealing and "burp" them. Place flat on a cookie sheet stacked up, then in the freezer. 
  • 24 Mini Cheesecakes (each meal had 4 minis): I used the recipe for filling, but to make the individual sizes I made my own graham cracker crust in 2 muffin tins. I made a double batch of graham cracker crust. TIP: replace the Cool Whip brand with Trader Joe's version so you don't get hydrogenated oils. I used TJ's graham crackers for my crust because they don't have high fructose corn syrup. After the crust is cooled, make pumpkin cheesecake mixture and spread evenly in all 24 muffin tins. Place filled muffin tins in the freezer for 1-hour. Using a knife, carefully pop out each cheesecake and place 4 mini cheesecakes in a pint-size freezer ziploc bag.
 Defrost/Reheating:
  • Defrost meatball and sauce bag in the fridge for 1-2 days. Remove the cheesecakes from the bag and place into 4 ramekins covered with plastic wrap.
  • Meal Day: Reheat spaghetti and meatballs on the stovetop. Cook spaghetti pasta according to package instructions. Cook peas or prepare other vegetable. 
  • Serve the dessert in the ramekin or in another plate for dessert. Each mini cheesecake may be a bit large for a small child. I can usually serve 2-3 times to Ava for a small dessert. She loved it!

Thursday, November 22, 2012

Favorite Cranberry Sauce

Simmering goodness!
Here we are at another Thanksgiving. The years go by so quickly! I found this recipe for Basic Cranberry Sauce in my Cooking Light magazine several years ago and I've made it every year. I'm making another batch for our Thanksgiving feast tomorrow as the cranberries are popping. It smells like orange and mulling spices. The sauce is so fresh, tart, but sweetened from the brown sugar and honey. It simmers with orange juice, cinnamon stick, and allspice.

I'm always amazed how the natural properties of the cranberries thicken the sauce as it cools on the stove top.

I think it's best when you make it the day before your meal so it will be chilled for the feast. I always make a double batch to go with the leftovers.

When I was a kid, I loved to eat cranberry jelly from the can. My grandparents would slice it on a plate along side the turkey. But now as an adult, I love whole berry cranberry sauce and nothing is better than fresh.

Cranberries are so good for you! They are so high in nutrients that science research has touted that they protect against a number of things such as heart disease, urinary tract infections, even preventing plaque on your teeth! So grab a bag or two in the produce aisle and try this recipe.

Happy Thanksgiving!

Friday, November 16, 2012

Freezer Meal: Sweet Potato Quesadillas & Black Bean-Corn-Edamame Salad with Red Velvet Cream Cheese Brownies

Quesadillas were perfect directly from the freezer!

Defrost and Mix.

I made this freezer meal for my September exchange and meant to post this recipe ages ago. Better late than never! I try to use seasonal produce because I'm making my meals in bulk and I want to buy top quality ingredients locally as much as possible. This meal is especially easy for the Summer since you don't have to use the oven to heat anything up, but it's great during any season. The quesadillas can be cooked directly from the freezer on an iron skillet. It was so easy!

Freezer Meal Menu:
Quesadillas
The recipe that I based this from used corn and since the salads had corn, I decided to use sweet potatoes and sweet peppers since I had so many peppers this time of year from my produce delivery. I diced the sweet potatoes very small the same size as sweet potatoes and cooked them on a skillet in olive oil with no seasoning, just a bit of salt. I used the Chile and Onion Trader Joe's tortillas. You have to be very careful with tortillas that you buy if you're shopping in traditional grocery stores because of the funky ingredients so I always buy ours at Trader Joe's. I made 30 quesadillas on a large non-stick griddle. I made the salsa verde with roasted tomatillos, onion, and jalapenos seasoned with lime, honey, cumin and salt. To cook quesadillas, warm them on both sides in an iron skillet. Cut in wedges and top with salsa and sour cream.

 
Homemade Tomatillo Salsa packs with the quesadillas.
Salad:

On Labor Day weekend, I had trouble finding fresh corn in Indiana since it was a bit late in the season. But I found an Amish produce stand where I picked up two dozen ears of corn by my in-laws lake house. I used one dozen for the freezer meal salads and the other dozen was for us to keep for the winter. I cut the corn off the cobs, then cooked the kernels in boiling water. You can also use frozen corn for this recipe since you're going to put it right back in the freezer if you make this in the off-season.

I cooked dried black beans in the slow cooker, which is my favorite method. Check out my post. If you use a 14oz can of black beans for each salad, make sure you rinse and drain it first. I always cook my own beans because you end up opening up way too many cans. Plus, it's more eco-friendly and budget conscious if you cook your own dried beans. You will need 1 1/2 cups for each batch for the recipe below.


Brownies:
These were very rich so I made two batches for the 6 meals so people would have a small sweet after dinner. I used a nice quality dark chocolate from Trader Joe's for the brownies. They were amazing!

I hope you enjoy these freezer meal posts. I really enjoy freezer cooking and our monthly exchanges. I usually set aside a couple weekends a month to make my meals on the weeks that we're home. Sometimes I have help from Ava and other times Aaron will entertain her outside while I'm cooking. Then we average a freezer meal per week, which we reserve for a Monday or Tuesday night.

Friday, September 28, 2012

Freezer Meal: Turkey Tomato Mac Casserole, Ginger Carrots, and Lemon Pound Cake

I've been trying to post this for a month! I finally finished the instructions!

For my August Freezer meal exchange, I couldn't think of anything to make so I decided to make a casserole that I throw together for my family. I made 7 casseroles this month so I could have an extra for our family and to give away to some friends who just had babies. The concept of freezer cooking is pretty new to me and we're loving the convenience of having a weeknight meal from the freezer. We started up a new freezer meal exchange group in February and have been going strong ever since!

We usually have to add a fresh green salad or cut up some fruit to serve on the side, but most of preparation is just reheating, grilling, or putting something in the oven. We defrost the meals in the extra fridge in the garage for about 24 hours. Some meals you can go right from the freezer to the oven or reheat on the stove top.

On Sundays, I pull out the meal for Monday and place the packages in a 9x13 casserole dish to catch any liquids that may spill out from defrosting. I usually prepare a freezer meal on a Monday evening and use the leftovers for lunch the next day.

My August Menu:
Tomato Turkey Macaroni Casserole
Ginger Carrots
Lemon Pound Cake

Tomato Turkey Macaroni Casserole

  • 3/4 pound ground turkey (mix of light and dark meat)
  • 1 1/2 cups dried macaroni noodles
  • 1 stalk celery, finely chopped
  • 1 tsp minced garlic
  • 1/2 onion, finely chopped
  • 1/2 cup cooked corn
  • 1/4 diced bell pepper
  • 1 1/2 cups tomato sauce
  • 1 1/2 cups shredded cheddar cheese
  • Seasoning - salt, pepper, paprika, oregano
Preparation for Freezing:
  • Cook macaroni noodles. Drain and set aside.
  • Saute onions and garlic with ground turkey. Then add corn and bell pepper. Season with salt, pepper, dried oregano, and smoked paprika. Add tomato sauce.
  • In a large mixing bowl, combine noodles, turkey-veggie mixture and 1 cup of shredded cheese.
  • Line an 8x8 square baking dish with foil. Coat with cooking spray. Fill with casserole and add shredded cheese to the top. 
  • Cover dish with foil and place in the freezer for about 45 minutes.
  • Remove top layer of foil. Flip the casserole dish upside down gently on the counter. Then use the foil to cover the square casserole. 
  • Place packaged casserole in a gallon freezer plastic bag in the freezer.
Reheating Instructions:
  • Defrost in the fridge overnight. 
  • Gently take off the foil from the top of the package. Then slowly remove the bottom layer and place into a greased 8x8 casserole baking dish.
  • Cook for 45 minutes in a 350 degree oven until bubbly.

Sweet Ginger Carrots 

Dump ingredients in a freezer pint plastic bag. Defrost in the refrigerator 24 hours. Then put contents in a sauce pan until carrots are tender. Season with a bit of salt and pepper. My friend, Windi's husband says these carrots taste like dessert!
  • 1 lb peeled, sliced carrots
  • 1 tsp ground fresh ginger
  • 1 tbs butter
  • 1 tbs brown sugar
Lemon Pound Cake:
Defrost and enjoy!

I found the Lemon Pound Cake recipe on Pinterest that made 6 mini loaves of pound cake in a single batch. This is convenient since we prepare 5 complete meals and I usually make 6 so I have an extra meal for my own family. I got a mini loaf pan that makes 4 at once. Then with the rest of the batter, I used my mini muffin tin to make 6 minis for each family (12-total). I have a bit extra batter to bake a ramekin dish size mini cake. The entire recipe was a perfect amount and the lemon pound cake was delicious.

Saturday, July 14, 2012

Grilled Pizza

Homemade Pizza and Caesar Salad our Friday night tradition!

We started a family tradition just before Ava was born to make homemade pizza on Friday night. I have perfected our favorite pizza using a whole wheat crust recipe that I make in my Kitchen Aid stand mixer. I usually make the pizza crust on Thursday night before bed and let the dough rise overnight. Then in the morning, I'll split the dough and wrap them in plastic wrap and store the dough balls in the refrigerator. We use a Pampered Chef pizza stone in the oven for the nights that we bake the pizza in the oven. We love it!

This summer has been unbelievably hot! It's been regularly 90 and even 100 degrees and we just can't justify using the oven for much these days. We are doing lots of cooking on our new grill and crockpot with these hot temperatures. Last summer, we went to the Pierce's house for dinner and they made a delcious grilled pizza. They were inspired by our pizza making tradition too! They made a BBQ chicken pizza on the grill and it was so tasty and didn't require heating an oven.

So last weekend, we tried grilled pizza after consulting with Shawn and his technique. Well, it got pretty charred because we tried to put the toppings on the crust after it flipped, while on the grill. Maybe we should have asked him for an in-person cooking class! I made two smaller pizzas and they both got pretty burned on the bottom. But this inspired Aaron to think of another way to grill it. Last night, I'm happy to report that we've perfected our method for cooking the pizza on the grill! It was delicious and not burned. The way we cooked it was similar to the oven, in fact, with the par-baking of the crust before you put the toppings on it.
Shape your pizza into a large rectangle so it fits easily on the grill or cookie sheet or serving platter to transfer easily.


Grilled Pizza:
Make ahead Whole wheat pizza crust - recipe makes 2 large pizzas or six 8-inch pizzas.
Non-stick cooking spray
Pizza sauce, toppings, and cheese

Method:
Thanks to Aaron for figuring this out!

  • Preheat grill.
  • Shape pizza crust into smaller rounds or one large rectangle with half the dough from the recipe above.
  • Get toppings ready. 
  • Par-baking: Spray crust with non-stick cooking spray and place on the grill. Close the lid and then grill for about 3 minutes.
  • Turn off the grill. Take the crust off the grill and bring inside or off the heat. On the opposite side that you grilled, add sauce, toppings and cheese. TIP: If you use a rectangular shape, you can place the pizza crust on a cookie sheet to transfer.
  • After the toppings are on the pizza, place it on the grill with indirect heat (other burner) for about 7 minutes. Then put the direct flame on low to cook for another 5 minutes or so. 
  • When the pizza is done, cut and serve immediately. 
We enjoy our homemade pizza with tomato sauce and fresh spinach, pepperoni (sparingly), and olives. 

I'm so excited to have grilled pizza this summer!

Thursday, May 17, 2012

Freezer Meals: Vietmanese Bahn Mi and Pho with Lemon "Donut" Dessert

Bahn Mi with Five-spice chicken thighs and pickled radish and carrot and vegetarian pho

Here's my latest freezer meal for our exchange tonight! I found all the recipes on Pinterest and they turned out great! I grew in East San Jose in a densely populated Vietnamese area. I love pho, Vietnamese noodle soup, and recently became a fan of Banh Mi sandwiches. The other families in my freezer meals groups are fairly adventurous so I thought it would be fun to bring in some Asian flavors. And it was a funny coincidence that another mom decided to make an Asian dinner.

For our freezer meals group, we make enough for ourselves and then trade about 4-5 entire meals with the other families. If we get more families involved we'll still max out at trading 5 meals, but we'll have more variety and can pick and choose which meals we want to bring home. It averages that we have 1 freezer meal per week for the month. I really like the deadline of the exchange to keep me on track with cooking for the next month. Here's my menu and how I made it freezer-friendly!

May's Menu:
Banh Mi Sandwich (on baguette) with Five Spice Chicken Thighs and pickled carrot and radish. 
  • Serve the sandwich with mayo, lime wedges, strips of jalapeno, chicken and fresh cilantro. I marinated the chicken, then froze it. The families will grill or broil the chicken. The pickled carrots and radish are very sweet, but smell terrible. Don't let the scent throw you. 
Vegetarian Pho soup
  •  Broth is frozen in ice cubes. Defrost directly in a saucepan on low, then turn up heat to bring to a boil. Add dry rice noodles. Warm thawed tofu and veggie packet and add to bowl with noodles. If you need more broth add vegetable or chicken broth and season with soy sauce or our favorite Bragg Liquid Aminos (a lower salt alternative).
Mini Lemon Muffin Donuts:
  • Thaw and serve
 
Freezer meal all packed up and ready to go!

Freezing instructions:

This month, I wasn't sure how to freeze this meal because of the broth. Liquid is so hard to freeze and defrost in ziploc bags without a big mess, so I had the brainstorm to freeze the broth in ice cube trays. I used the ice cube trays with tops that I bought for when I was making Ava's baby food. Then, I popped the broth cubes in a quart size freezer bag.


Freeze the tofu and veggies in one bag and the marinated chicken thighs in another.


Don't freeze the pickled veggies. Store them in a mason jar with the brine, which will keep in the fridge for up to 4-weeks. The limes and jalapenos are sturdy enough to keep in the fridge for a few weeks or you can buy more. I didn't supply the cilantro, but you need that to be fresh.


I didn't freeze the rice noodles for the pho, but those can be stored in the pantry.

I'd love to hear your ideas on freezer meals you're thinking of making!

Thursday, April 26, 2012

Freezer Meal: Sweet Potato-Chickpea Curry & Naan Bread

Last Sunday, Ava and I went to our third freezer meals exchange group. We take turns hosting the big swap. We trade family meals that we'll use for the next month. We trade 4 complete meals, but we plan to have more people in the group so we can have 5 meals to trade and people can have their pick for variety. One of the moms couldn't make it this month, but three of us met up tonight to swap meals. I'm really happy to have these meals in the freezer because we average one freezer meal per week. It's so convenient! The advantage that I found with the group is that we keep ourselves on track with the bulk cooking and then trade for a variety of different meals. We started the group in January and held our first meet-up in February an original four La Leche League moms. Since we're like-minded moms (eco-friendly, health-conscious) we started out with the guidelines to use as much local, organic ingredients as possible. Our meat choices must be local and natural too. We cook a family meal and provide an entree, side dish, and dessert. If your dish requires items from a pantry, then you need to provide it. We include the instructions for reheating and finishing the meal. When we started I bought some cheap casserole dishes to use for freezing. Anna told us how to package with freezing our meals into standard dishes and bags in the freezer to minimize space and eliminate the need for passing around dishes. I stocked up on plastic freezer bags, wraps, and foils and away we went.

We've discovered that it's helpful to spread out the cooking in multiple days. Yes, it requires some planning! I select my meal for the next month on the day we meet so I can spend the entire month planning. I consider the month ahead and plan the weekends when we're home to cook. It's working really well! I usually make an extra family portion for our dinner either cooking it fresh or adding to the freezer stash.

This month, I made a Chickpea-Sweet Potato, Cauliflower Curry with homemade curry paste with homemade Naan Bread, from my Simply in Season cookbook.I always cook dried chickpeas for the curry in the slow cooker. I provided a cup of Jasmine rice for every meal and a set of cookies for dessert (either Thumbprints or Sesame Sunflower Seed Refrigerator cookies).

I normally make the chickpea curry using a pre-made sauce from Trader Joe's. Since I was making such a large batch of curry I wanted to spread it out over 2 cooking days and make the curry paste from my favorite cookbook, Feeding the Whole Family. I spread it out in multiple steps: shopping for ingredients, cooking dried chickpeas in the slow cooker, cooking curry and naan bread batches in 2 different weekends, and baking cookies over 2 different weeks. It worked out very well! I used the time to make enough for our meal and then freeze the rest. This made it really easy to do the bulk cooking.

This version of the curry was made with: crushed tomatoes, chickpeas, sweet potatoes, onions, carrots, coconut milk, cooked in coconut oil and seasoned with a generous portion of curry paste and sea salt. It was delicious served over the Jasmine rice. I finally nailed the Naan bread recipe, too! Aaron and Ava love it. You can reheat the naan in an iron skillet.

Next month, I'm going to make a Vietmanese meal with chicken Bahn Mi sandwiches and vegetarian pho. I'm going to pickle some veggies for sandwich. I'll reuse the small 4oz jars that I got from the pimentos that I bought for my March meal, Chicken Spaghetti casserole.

Sunday, April 22, 2012

Make-Ahead: Homemade Curry Paste

I'm meeting this afternoon with the other moms in my freezer meals exchange. We're going to trade our freezer meals. This month, I made a Chickpea-Sweet Potato and Cauliflower Curry and used a homemade curry paste. Usually, I buy the sauce from Trader Joe's as a base (check out my recipe here). But since I was cooking at giant batch for 6 meals. I decided to make to try a recipe in my favorite Feeding the Whole Family cookbook. The paste is fantastic and not too spicy for the kids. If you want to add some kick, I suggest doing so in the dish that you're cooking directly or when you serve the meal offer hot sauce on the table.


I had fun making the paste. I used my coffee grinder that I converted to spice mill. Ava had fun helping me pour the whole spices in the grinder. The house was very fragrant when it was cooking. I used a generous amount of curry paste (about 1/4 cup) to make a double batch of curry. I didn't use any additional seasoning except salt and it had a really flavor.

Storage: Put the paste in mason jars and they will keep in the refrigerator for many months.

Homemade Curry Paste
A flavoring in soups, beans, curry stews, and vegetable dishes.
Makes 2 cups

Ingredients:
  • 1 cup extra virgin olive oil
  • 1 pound onions finely chopped
  • 1/4 cup whole cumin seeds
  • 1/4 cup whole coriander seeds
  • 1 tsp whole fenugreek seeds
  • 1 tsp whole cloves
  • 2 tsp black peppercorns
  • 2 tbs whole mustard seeds (about 1 oz)
  • 2 tsp allspice
  • 1 tsp cardamom 
  • 4 tsp ground cinnamon
  • 1/4 cup turmeric
  • 2 tsp cayenne
  • 1/4 cup peeled, finely chopped ginger
Preparation:
  •  Heat oil in a 2-quart pot. Add onions and sauce until very soft. 
  • While onions are cooking, grind the following whole spices to a fine powder in a coffee or spice grinder: cumin, coriander, fenugreek, cloves, peppercorns, and mustard. Add to onions. Add the remaining spices and fresh ginger to the onion mixture; let cook about 5 minutes while stirring. Store in a sealed jar(s) in a refrigerator, where it will keep for several months.
If I make this again, I think I'll puree the entire paste since the onions are still fairly large. 

Friday, March 2, 2012

Pizza Crust

Let dough rise and double in size.
Just before Ava was born, we started a weekly tradition on Friday nights to watch a movie and make a homemade pizza. We started out using the Trader Joe's fresh, uncooked pizza dough. I'd roll out the dough each week for the pizza. Both the white flour and whole wheat options were great! But recently, I started to make our own pizza crust. Aaron thought I was crazy for buying flour in bulk at Costco, but we use it with all the baking and now pizza crust that I make from scratch.

I really like the recipe from my favorite cookbook Feeding the Whole Family. The dough is hearty. You'll be satisfied by this crust by eating less pizza. That saves calories! Ava likes the thick crust and it's easier for her to hold. She prefers our homemade pizza over the daycare or restaurant pizza!

Use 1/2 recipe for dinner and wrap the other half for the next pizza night.
I make the pizza crust once every two weeks. It makes enough dough for two full-size pizzas. I use my Pampered Chef pizza stone to bake it. Parbaking is a key step to homemade pizza. If you put the toppings on the fresh crust, it may not cook through before the toppings are brown. 

Time savings: I'd recommend breaking this up in two steps. Make the dough and let it rise overnight or when you have a long afternoon at home. Then package the dough. Later come back to the dough to make the pizza.

Marilyn's Best Pizza Dough (adapted from Feeding the Whole Family)
Makes enough dough for six, 8-inch pies or two family size 

Ingredients: 
  • 2 tsp yeast
  • 2 cups lukewarm water
  • 1 tbs olive oil
  • 1 tsp sea salt
  • 2 cups whole wheat pastry flour (up to 3)
  • 3 3/4 cups unbleached white flour (or 2 3/4 cups depending on your wheat flour)

Method:
  • To make dough: combine the yeast in lukewarm water in a large mixing bowl or stand mixer. Let rest for 10 minutes while the yeast comes to life. Gently stir in olive oil. Mix salt and whole wheat pastry flour. Using the paddle attachment, mix flour with water/yeast mixture. Beat until stretchy or elastic. Add unbleached flour to make a soft dough. Change paddle attachment to the dough hook and knead until the dough is combined. Cover and let rise for 1-2 hours OR overnight. **Often times, I let the dough rise overnight and on Friday morning, I do the next step to package in the refrigerator.
  • To make the pizza: deflate, divide and shape into 5-6 balls or 1/2 in making large thick pizzas.  Relax the dough for 15-minutes.Smaller balls will make 8-inch pizzas, which is fun for customizing toppings for family members. **At this pint, package the dough in plastic wrap, then a plastic bag. You can either refrigerate or freeze the dough at this point.
  • Preheat oven and pizza stone to 350 degrees. Shape the dough by using your finger to make tapping indentations rather than pulling the dough. I've also used the rolling pin too. Place the dough on the pizza stone or baking sheet coated with cooking spray. 
  • Parbake large pizza for 10 minutes. OR small pizzas don't require parbaking. Add toppings and cook on 500 degrees for about 6-minutes on the lowest rack. 
  • If you parbaked, add toppings then bake for another 11-12 minutes on 350 degrees.
    Pizza dough rolled and ready for parbaking.


Friday Night Family Pizza Dinner. Our favorite pizza combo is fresh spinach, olive, and cheese and we love it with Caesar salad. Time for a movie!
Ava's plate! She loves pizza and we serve her fruit on the side. When she's using her play kitchen she talks about making pizza.

Wednesday, February 29, 2012

Grain and Dairy Free Banana Nut Waffles

The waffles smell fantastic!

We served the waffles with butter and maple syrup along side pears.
Last Sunday, I tried a new waffle recipe. Ava and I loved them! Aaron wasn't a fan, but he's picky. We're doing fine with whole grains and dairy, but the recipe sounded really tasty! I saw the waffle recipe on the Joyful Abode blog and Emily raved about the recipe so I had to try it.

The waffles are made with ripe bananas, almond meal (flour), eggs, and pumpkin spice. It smelled like a pumpkin pie was baking! I can see why Emily's daughter called them cookies. They're sweet and have fall spices. Ava and I love anything with cinnamon. Aaron loves the homestyle buttermilk waffles that we usually make when we're in the mood for waffles. You might want to give it a try if you want a traditional waffle.

I buy almond meal at Trader Joe's, but you can find it at Whole Foods or other health food store. Another idea is to make the waffles with half almond meal and half whole wheat flour to make the texture spongier like a grain consistency.

I instantly thought of my sister-in-law, Jessica, who battles wheat and dairy sensitivities when I made the waffles. She uses Earth Balance instead of butter, but this recipe calls for coconut oil to grease the waffle iron. It reminded me of using coconut oil in place of butter. I tried the Earth Balance on a slice of fresh bread when we were visiting Jessica in Portland and I couldn't eat it. Since she hasn't eaten butter in so long, she likes it.

Paleo Banana Nut Waffles from Joyful Abode Recipe (makes 3 full size waffles).
Do you think Ava liked the waffles? :)

Although, the downside to eating waffles is that I need to eat them with more protein. It's not just this waffle recipe, but any time that I eat just waffles or pancakes for breakfast. I was very hungry after a couple hours of eating my waffle. I thought it may fill me up because there are 4 eggs in the batter and almonds have protein. Next time, I'll eat them with additional protein.

Tuesday, February 21, 2012

Freezer Meals Club and Sweet Potato-Black Bean Enchiladas with Homemade Sauce

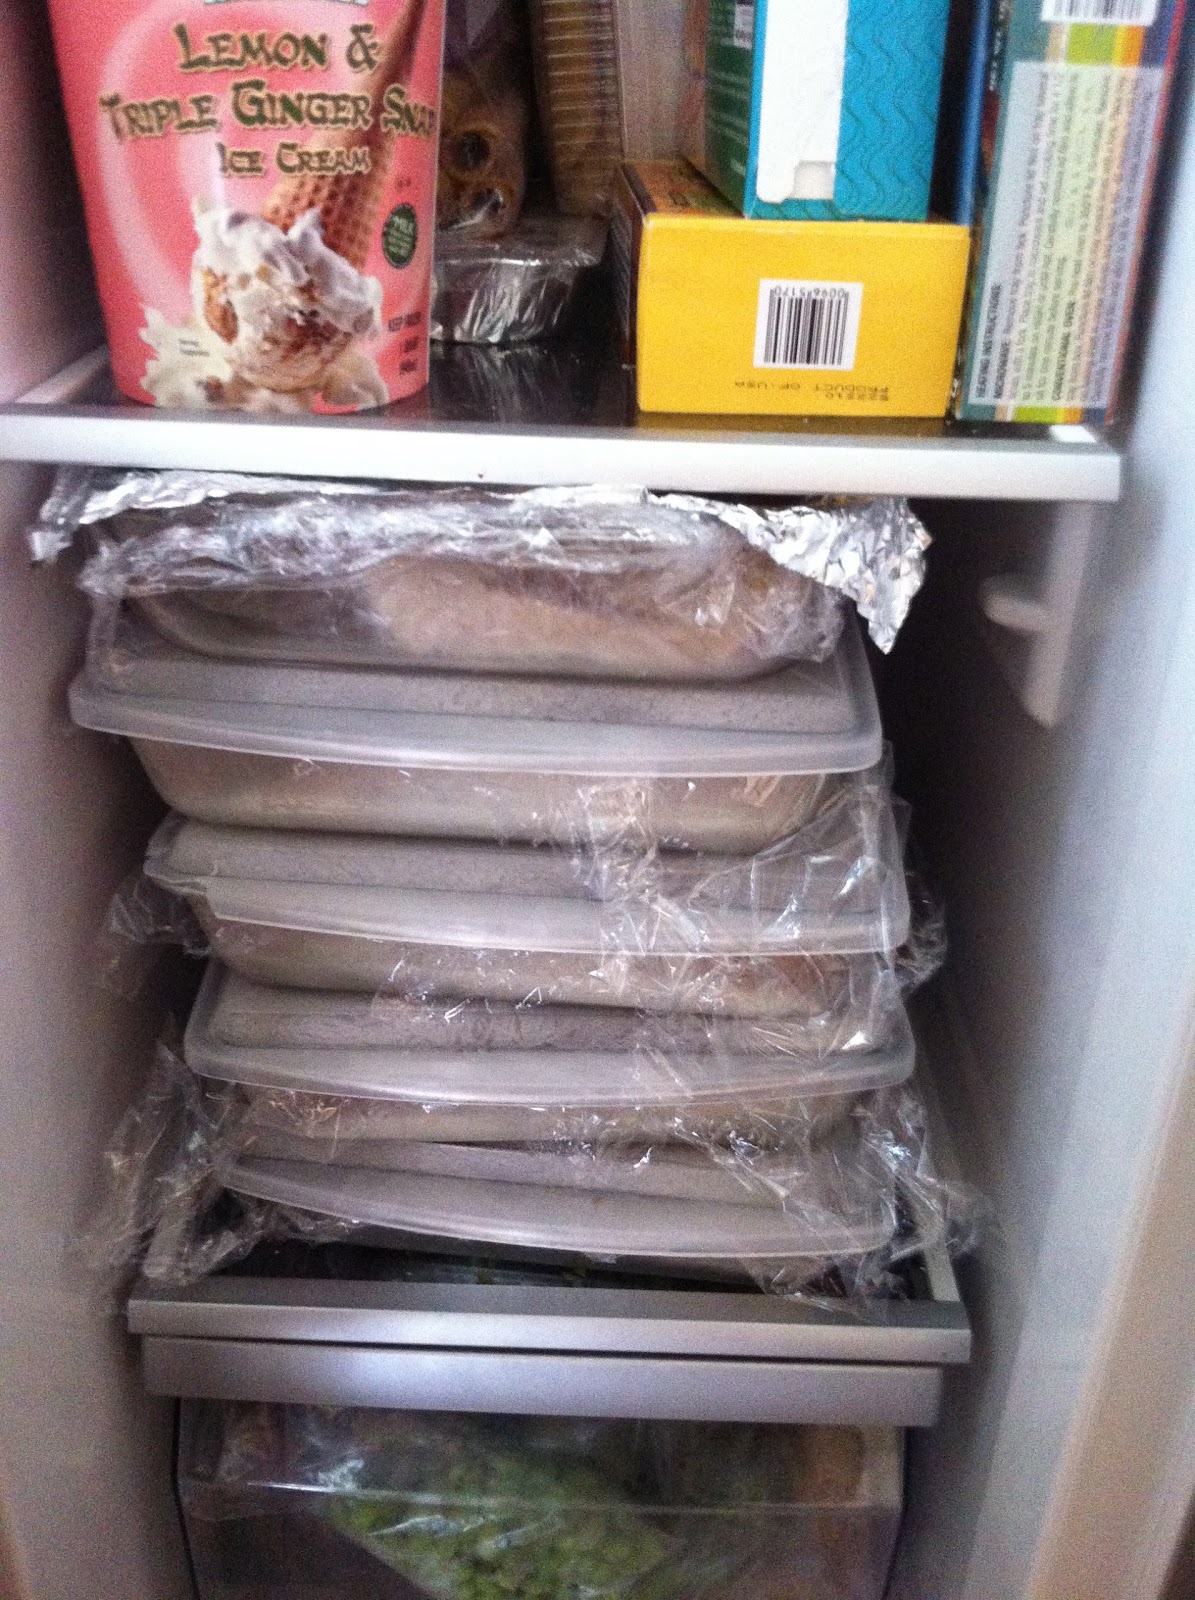
I cleared a space in my freezer. Five pans of enchiladas.

Last night was my first meet up for the Freezer Meals group that I joined. One of the moms in my La Leche League group had the idea to start up a new group and there are five moms that are participating in this first meeting. Freezer cooking is a whole new world for me. I heard about stocking your freezer when you're expecting a baby, but I had no idea how to do it. Any busy family would find it helpful to have meals prepped in the freezer to whip out for a week night. I work from home two days a week, which helps because when I work in the office I don't have time to cook in the evening. I usually cook on Sundays for the week anyway. So freezer cooking appealed to me because you cook in bulk.

Our Ground rules: Our group decided to exchange frozen meals to serve 5 people in family. The meals should be healthy and if you include meat, it should be locally sourced without antibiotics. The idea is to provide a meal with a side dish or dessert and any add-on items for the pantry. We wrap up the meals in plastic wrap or foil and then freeze for the monthly exchange. The week before, the women add a blog post with their upcoming menu as the RSVP. I decided to make 5 meals to giveaway and 1 meal for ourselves, which I cooked on Sunday night.

My first freezer meal is Sweet Potato-Black Bean Enchiladas with homemade sauce and glazed carrots. I was disappointed with the corn tortillas because many broke open after I rolled them in the pans. But once you put the sauce on top, you won't notice. I make this filling all the time for my own family, but I wanted to make a homemade sauce similar to the one that my family makes.

Enchiladas cooked!
Enchiladas wrapped and ready to go with the sauce and side dishes. I packed shredded cheese separately for the exchange (left unfrozen).
Freezing the meals was interesting! I'm lucky to have another refrigerator in our garage so I could manage the bulk cooking. I cooked the enchilada sauce last Sunday while Ava was playing with Grandma and Grandpa. I stored a quadruple batch of sauce in the fridge all week. For the dried black beans, I had to cook it in the slow cooker in two batches because there were so many beans. I cooked 1 batch on Sunday overnight and the next batch while the slow cooker was still out on Monday while we were at work. Again, I'm glad we had lots of refrigerator space to store all those cooked beans! Then this weekend, I cooked the rest of the filling - sweet potatoes and onions with peppers. Saturday night, I assembled the enchiladas and placed them in the pans to freeze. I portioned the sauce in freezer bags separately because I read from another website that tortillas would be soggy if they were frozen with the sauce. It was helpful to space out the cooking load to several days.

Red Enchilada Sauce (courtesy of Nourishing Traditions by Sally Fallon)
Makes 3 cups 

I quadrupled this recipe to make 6 pans of enchiladas and I still have a couple more servings left with all the sauce. So I froze an extra batch to use later. The sauce is very thick compared to store bought. I couldn't find enough dried chiles for my extra large batch so I used 3 large poblano peppers chopped and cooked them with the onions and garlic.

Ingredients:
4 ounces whole dried New Mexico or Ancho chiles
1/4 cup extra virgin olive oil
1 medium onion, finely chopped
1 tsp ground cumin
2 cups beef or chicken stock
2 cloves garlic, minced
2 small cans of tomato paste
1 tbs red wine vinegar
Sea salt to taste

Preparation:
  • Wearing gloves, clean the dried chiles by removing the stems and seeds. Don't touch your face. Set aside in a bowl.
  • Saute onion in olive oil. Add cumin and cook, stirring constantly, until well amalgamated into the oil. Whisk in garlic, tomato paste and vinegar. Add stock and chiles, bring to a boil. Reduce to a simmer. Simmer covered for about 45 minutes. 
  • Pass the sauce through a food mill or puree in the food processor. Season with salt to taste.
Sweet Potato-Black Bean Enchiladas
Makes 12

Ingredients:
  • 1 cup dried black beans, soaked over night. 
  • 1 sweet potato, chopped in bite-sized pieces
  • 1/2 onion, chopped
  • 2 cloves garlic, minced
  • 1/2 jalapeno pepper
  • Taco seasoning - dried oregano, ground cumin, and chili powder (1 tsp of each)
  • Sea salt (about 1/2 tsp) for the filling
  • 12 corn tortillas
  • 2 cups of red enchilada sauce
  • 1 cup of shredded cheddar cheese for topping
  • Garnish suggestions: sour cream, avocado, chopped fresh cilantro
 Preparation: these can be done ahead of time and stored separately in the refrigerator.
  • Cook soaked black beans in the slow cooker overnight or all day (on LOW for 8-hours). Water should be about 2-inches above the beans. See my blog post on detailed instructions.
  • In a large preheated skillet, add cooking spray or olive oil. Cook onions, peppers, and sweet potatoes on medium-low until the sweet potatoes are tender (about 25 minutes). Add seasoning to the vegetables when you start to saute. 
  • To assemble: Mix black beans with sweet potato-onion mixture and add sea salt. Warm tortillas. Fill corn tortillas with about 3 tablespoons of bean-sweet potato mixture.
  • **If cooking immediately: coat 9x13" casserole dish with cooking spray. Add a few spoonfuls of enchilada sauce to the bottom of the dish. Begin adding enchiladas to the pan. You can fit 8 across vertically and 4 horizontally at the top. 
  • **If freezing, line the casserole dish with plastic wrap. Build enchiladas in the dish in the same format. Freeze sauce in a separate container or bag. When cooking, add defrosted sauce on the bottom of the pan before baking. 
  • Add remaining sauce by spreading evenly on the enchiladas. Sprinkle with shredded cheese.
  • Bake in a 350 degree preheated oven for 45 minutes.
If you have extra filling left, you can squeeze in more enchiladas or save it for a burrito for a quick meal later in the week.

Serve the enchiladas with vegetables or a green salad. Garnish with hot sauce, avocado, fresh cilantro, and sour cream. Let me know what you think!

Sunday, February 5, 2012

Mexican 7 Layer Dip

The Roman Numeral Installation outside of my office building.

Georgia Street – constructed in time for Super Bowl.

Minced black olives make the flavor more evenly distributed.

All 7-Layers complete
Today is Super Bowl Sunday! It's been such a fun time to live in Indy. Aaron and I work on Monument Circle and our company, ExactTarget, has been enjoying the festivities and helping take part in the marketing efforts. We took pictures in front of the roman numeral installation and we had a fun company party last Wednesday. All three of us had fun!

The entire city has been enjoying the Super Bowl Village and NFL experience. The zip line has been the major attraction along with the temporary party tents and outdoor live concerts. The Host Committee has also added breast cancer awareness and even the first ever lactation room in the village. It's been wonderful that they have planned for families!


We're heading to a friend's house to watch the game and I just made Mexican 7-Layer Dip. It's a recipe that my step-mom made when I was growing up for all the pool parties we'd have with the neighbors. I make it in a casserole dish so it serves a crowd. The dip has lots of flavor and the difference is taco seasoning is mixed in the sour cream.


Mexican 7-Layer Dip
Serves a crowd

Ingredients:
  • 1-14oz can refried beans
  • 1-16oz container sour cream
  • 2 cups prepared guacamole
  • 1 small packet of taco seasoning (or use a blend of chili powder, cumin, oregano, and cayenne)
  • 3 tomatoes, diced
  • 3 green onions, thinly sliced
  • 1-14oz can of whole black olives, minced
  • 2 cups shredded cheddar cheese


Preparation:
  • Spread refried beans, guacamole, in the bottom of a 9x13 inch casserole dish. Mix taco seasoning with sour cream and spread on top of the guacamole. 
  • Add diced tomatoes, green onions, olives, and shredded cheddar cheese.
Serve with tortilla chips. The dip is so dense, it works best to offer a serving spoon for guest to scoop out the dip onto their plates. 

It's really easy to make and the dip is always a crowd pleasure!


Sunday, January 29, 2012

Cauliflower-Sweet Potato and Chickpea Curry

Last January, we went full force into the vegetarian lifestyle. Around October, we started to eat a bit of meat. Aaron eats meat more than I do, but I eat some meat. I'd classify myself at 95% vegetarian. I really craved bacon when we weren't eating any meat. So on occasion, I've eaten bacon, fish, or turkey on Thanksgiving. But our family meals at home are still vegetarian.

I changed the way that I cook and stock the pantry. I buy whole grains and dried beans from the bulk bins at Whole Foods. Ava loves to help out with shopping at the bulk bins! I've learned to cook dried beans easily in the slow cooker. I typically cook a big batch of beans every week in the slow cooker for many different meals. We often cook pinto beans which are great whole or refried for burritos. I also like to make chickpeas for curry, felafel, and hummus.

This curry recipe is something that I threw together one night and it ended up in our regular rotation. I like this dish because it's hearty with all the veggies, beans, and rice, and I take a short cut with store bought curry sauce. I add milk to the sauce to stretch the sauce since there are so many vegetables and it boosts the protein factor. It's relatively easy to make because you just have to chop the veggies and let the curry simmer on the stove top. As a busy working mother, I really like the meals that I make in stages so that I can walk away from the kitchen. I tend to cook in "bursts" now.

If you don't live near a Trader Joe's to buy this curry sauce, substitute your favorite curry sauce. The sauce has a spicy punch, but adding the milk cools it down enough for children. You'll need about 2 cups of liquid to simmer the vegetables. The sauce has quite a bit of sodium, so be careful not to add to much salt. I cook the chickpeas myself so I add a bit of salt to season since the beans don't have any salt.

Serving suggestion: The curry is great served with warm naan bread and fresh seasonal fruit.

Cauliflower-Sweet Potato and Chickpea Curry
Serves 4 (main dish, 6 side dish)

Ingredients: 
  • 1 medium head of cauliflower, cut into florets
  • 1 medium sweet potato, cut into bite-sized pieces
  • 1 onion, diced
  • 1 tsp minced garlic
  • 2 tsp olive oil
  • 3 cups cooked chickpeas
  • 1 jar Trader Joe's Yellow Curry sauce
  • 1 cup milk
  • 1/2 cup frozen peas (optional)
  • 1/2 tsp salt *if using unsalted home-cooked chickpeas.
  • 1 cup jasmine rice


Preparation:
  • Chop vegetables. Preheat a large dutch oven or pot to medium heat. Drizzle olive oil. Add diced onion, sweet potato and garlic. Saute until onion is translucent. 
  • Add cauliflower florets and sauce. Pour milk in the empty jar and put the cap back on. Shake the jar so that the milk loosen the thick curry sauce and pour the contents into the pot with the vegetables. Bring to a boil, then reduce heat to a simmer. Add cooked chickpeas.
  •  Cook jasmine rice according to the package directions.
  • Simmer for 30-45 minutes for the flavors to combine. Add frozen peas in the last 10 minutes of the simmering process. Vegetables should be tender.
  • Serve curry over hot cooked rice.

I made this curry for my in-laws and my mother-in-law really liked it. She suggested that I post it onto the blog. Enjoy!