Wednesday, February 29, 2012

Grain and Dairy Free Banana Nut Waffles

The waffles smell fantastic!

We served the waffles with butter and maple syrup along side pears.
Last Sunday, I tried a new waffle recipe. Ava and I loved them! Aaron wasn't a fan, but he's picky. We're doing fine with whole grains and dairy, but the recipe sounded really tasty! I saw the waffle recipe on the Joyful Abode blog and Emily raved about the recipe so I had to try it.

The waffles are made with ripe bananas, almond meal (flour), eggs, and pumpkin spice. It smelled like a pumpkin pie was baking! I can see why Emily's daughter called them cookies. They're sweet and have fall spices. Ava and I love anything with cinnamon. Aaron loves the homestyle buttermilk waffles that we usually make when we're in the mood for waffles. You might want to give it a try if you want a traditional waffle.

I buy almond meal at Trader Joe's, but you can find it at Whole Foods or other health food store. Another idea is to make the waffles with half almond meal and half whole wheat flour to make the texture spongier like a grain consistency.

I instantly thought of my sister-in-law, Jessica, who battles wheat and dairy sensitivities when I made the waffles. She uses Earth Balance instead of butter, but this recipe calls for coconut oil to grease the waffle iron. It reminded me of using coconut oil in place of butter. I tried the Earth Balance on a slice of fresh bread when we were visiting Jessica in Portland and I couldn't eat it. Since she hasn't eaten butter in so long, she likes it.

Paleo Banana Nut Waffles from Joyful Abode Recipe (makes 3 full size waffles).
Do you think Ava liked the waffles? :)

Although, the downside to eating waffles is that I need to eat them with more protein. It's not just this waffle recipe, but any time that I eat just waffles or pancakes for breakfast. I was very hungry after a couple hours of eating my waffle. I thought it may fill me up because there are 4 eggs in the batter and almonds have protein. Next time, I'll eat them with additional protein.

Monday, February 27, 2012

Supporting Breastfeeding as a La Leche League Leader

Nursing between family photos at 5-months old.
Ava taking a break at the LLL conference 13-months.
My favorite nursing picture taken at Butler University.

Ava is a healthy, vibrant little girl!

She says "mama hand" when she wants to hold my hand.
It's official! I was accredited as a La Leche League Leader today! It's been a year in the making. Here's a look back at my original post.

I've been a member of La Leche League Broad Ripple, one of the first groups that formed after the original founding members started the mother-to-mother support organization in the 1950's. Our group's three other co-leaders are second generation LLL leaders. Their mothers brought them to meetings as nurslings to meetings and now they're mothers and leaders in the group. My mother-in-law was a LLL leader when my husband and his sisters were growing up. It's been such an honor to get involved and carry on a Berkey tradition. I'm proud that even with working outside the home and recently starting to travel for work, Ava has never had a drop of formula or cows milk in her life. She's turning 2-years old in just a few weeks. The highly bonded relationship that we've established through breastfeeding is so rewarding. It's so special to me that I'd like to help other mothers through their breastfeeding journey!

The best thing about volunteering as a LLL leader is that I bring Ava with me. Since she's so into babies, it works out perfectly! Ava came to all conferences and events with me sitting on my lap playing or sleeping in a carrier while I learned. Ava seems to understand when she sees pregnant mommies that there's a baby growing in her tummy. My hope is that by raising Ava with the LLL philosophy of mothering through breastfeeding and being together as much as possible, that she'll pass on that tradition to her children if she becomes a mother one day.

I'm really passionate about helping mothers achieve their breastfeeding goals, especially working mothers who face some serious obstances. I've talked to many working mothers that felt defeated by the separation from their baby. But working doesn't mean you have to wean. And it doesn't mean that you can't breastfeed part-time either. As part of my new role in the group, I'm going to lead a series meeting downtown during lunchtime to help working breastfeeding mothers. Our first meeting is in a couple weeks! I'll also co-lead the evening meetings a couple times a month. Being a leader means that I'll respond to the group breastfeeding phone hotline, emails, and Facebook private group questions. Since I'm one of several other leaders, we spread duties which helps us provide more services.

My training for becoming a leader was extensive. It started with a morning kickoff meeting at the Indianapolis Museum of Art cafe with three other mothers. I went to educational conferences, read books, wrote responses to writing and exercises. And recently, I've started to take a more leadership role in our group by responding to mother's concerns and technical questions. I'm proud of myself that I accomplished this while balance my family and career responsibilities. I've learned to relax some things to get more sleep. Aaron challenges me on that all the time because there was a time that I was over extending myself. Now, I'm more rested and feeling much more balanced! I'm ready to share and listen!

Saturday, February 25, 2012

Got Cloth Diaper Stink? Time to Strip!

Check out the clean diapers! I stripped the cloth prefolds and my all-in-one diapers.
Last week, I had enough of the diaper funk! One of Ava's caregivers has mentioned recently that Ava's diaper is very foul after it's wet. And last week she had a diaper rash, though probably unrelated, but who knows! After doing some reading on the cloth diaper websites, I felt it was time to strip the diapers of the build-up. Cloth diapers get build-up from a number of factors such as diaper creams/oils touching it directly or residue from detergent. In our case, we have a HE washing machine and hard well water. I suspect that our diapers have a build-up from the hard water more than anything. We struggle with residue in our coffee maker and kitchen. Recently, I bought cloth diaper fleece liners in case Ava needed barrier cream for a diaper rash to help protect the absorbancy of the cloth. Usually when we're home and Ava has a sensitive bottom, I add baking soda to her bath water and it really helps. Going diaper free for awhile helps too!


We do the basic fold (in thirds) inside the Bummis diaper covers.
The stuffed diaper. I send them like this to daycare.
We switched over to cloth diapers when Ava was about a year old and it's been awesome! We've saved so much money and it's really cool to save the environment's resources. The laundry duties isn't bad since we have a brand new appliances and the laundry room is on the second floor. Ava likes to help too!

I've never had to strip them until now. Some people strip them as often as every week or once a month. I plan to wait until they get build-up again.

I asked my Facebook Land for some suggestions. Lots of moms jumped in with advice of the methods that worked for them. I found a couple of sources that said the same thing that really seemed to work for my friends. So last night after daycare, I did a marathon of diaper washing! This morning, I finished with one more cycle of rinsing and drying. They smell great! Right out of the wash, the cloth diapers never smelled dirty. It was just after the first pee that the diaper smelled funky.


Diaper Stripping Method (cloth inserts and all-in-ones):
  • Step 1: Wash diapers normally (cold rinse, then detergent wash with extra rinse). On my machine, we use the whitest whites cycle. I removed my diaper pail liner, cloth wipes, and covers from the wash to dry at this stage.
  • Step 2: Optional to remove oil residue. Wash diapers with some dish detergent (Dawn). For HE machines, use 1 tsp. I did this on my whitest whites cycle.
  • Step 3: Bleach on whitest whites (hot wash + extra cold rinse). Yep! Bleach. It's old fashioned, but it works and you do lots of extra rinses afterwards.
  • Step 4: Rinse 3-4 times until there are no more suds. I used the Rinse Drain and Spin setting.
  • Step 5: Dry diapers.
Drying diapers in the sun will also help disinfect funk, but I live in Indiana and it's winter. Ok, and I need to install a clothing line! :) I think Aaron would call us Amish if we did. He grew up in the Amish country and they line dry their laundry all year long.

It would be easier to do this on the weekend or a day that you're at home. But, I spread it out over Friday night and Saturday morning because I worked in the office yesterday. While we had the cloth diapers in the wash, we used a few disposable diapers left over from our trip to Portland. When we travel by plane, we switch to disposables. But if we're visiting my in-laws or traveling by car, we launder the diapers before/after the weekend or ask nicely to use their washer and dryer.

Resources:
  • Great blog post with instructions from myfirstbaby.com. 
  • I loved this video from the Mama Natural Blog. Her husband, Mike, runs through a tutorial of how they strip their diapers, which is the same method from myfirstbaby.com.
PS... I love that Mike is doing the diaper wash in the video. I need to show this video to Mr. Berkey to see if he's inspired to do diaper laundry! 


Wednesday, February 22, 2012

Freezer Meals Exchange First Meet-up

What each person took home this week!
This week kicked off our first freezer meals exchange group. We met on Monday night at Anna's house. Anna is our organizer and I'm thrilled to take part. Four moms, including myself, participated this month. We cooked, froze, and packaged meals, which we transported to Anna's house. Here's a look at the first set of meals:

  • From Windy: Healthy BBQ Chicken (slow cooker) served over penne pasta. Mini cheesecakes (cherry or chocolate chip) for dessert.
  • From Anna: Orange Veggie soup with Beer Cheese Bread and pretzel white chocolate bark for dessert.
  • From Rachel: Sun-dried Tomato Spinach Feta Bake and Chocolate Revel bars for dessert.
  • I made Sweet Potato-Black Bean Enchiladas with Red Sauce and Glazed Carrots side dish.
Each person left with each of these meals! Look at the spread! Since Rachel cooked her meal on the day of the exchange and it was fresh, I baked her casserole last night for dinner. It was really tasty! I appreciated how easy it was to pop that in the oven when I got home from work. I made a green salad, cut fruit and sliced bread for the complete meal. Aaron tried the casserole, but his food aversions made it hard for him to eat it. But we ALL loved the chocolate revel bars. I'm glad to have the casserole for my own lunches this week. I really liked it.

Since I'm already doing bulk cooking for the exchange, I plan to add one or two extra meals for my own freezer. We're heading to Aaron's sister's house in a few weeks after our new niece is born so I'm planning on bringing an extra frozen meal to them! I figure with all the families I know there are plenty of people that can use an extra hand.

Here's the full menu and recipes that we exchanged. For next month's menu, I'm going to try The Pioneer Woman Chicken Spaghetti. I've heard it's amazing and it will freeze well. I'm excited to host our next meet-up in March!


Tuesday, February 21, 2012

Freezer Meals Club and Sweet Potato-Black Bean Enchiladas with Homemade Sauce

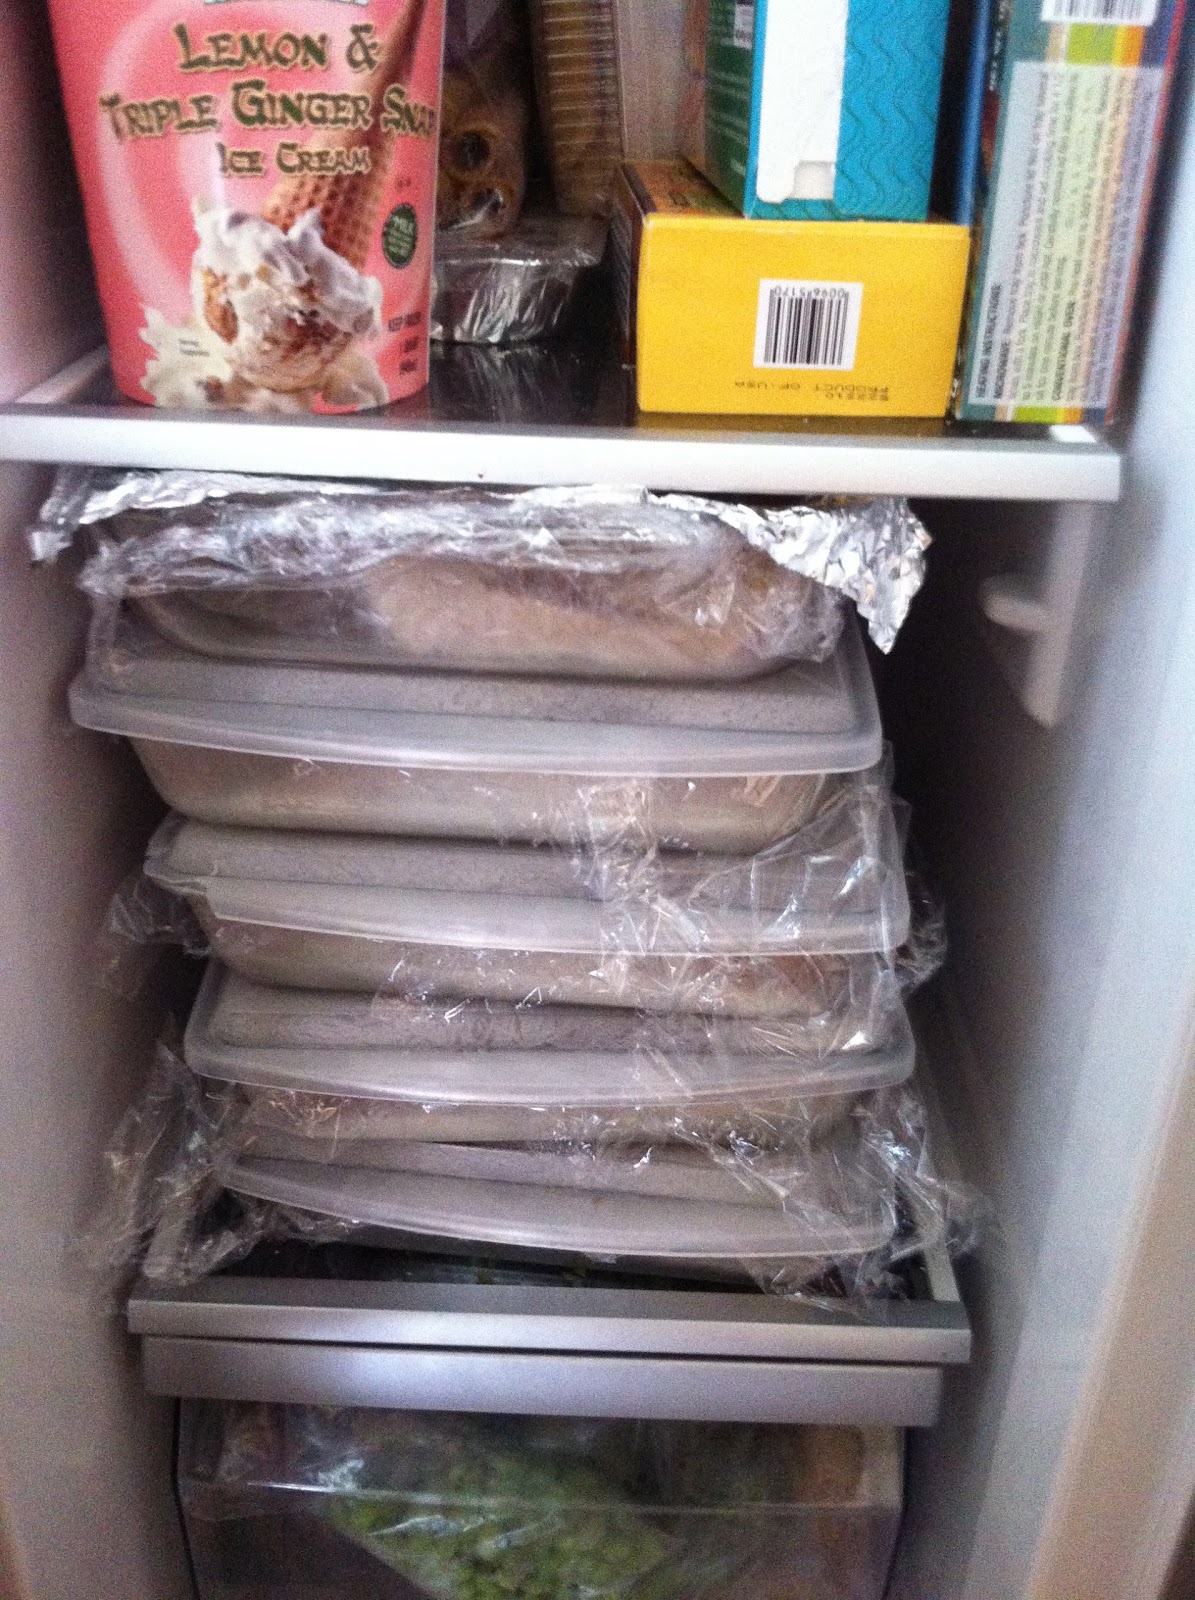
I cleared a space in my freezer. Five pans of enchiladas.

Last night was my first meet up for the Freezer Meals group that I joined. One of the moms in my La Leche League group had the idea to start up a new group and there are five moms that are participating in this first meeting. Freezer cooking is a whole new world for me. I heard about stocking your freezer when you're expecting a baby, but I had no idea how to do it. Any busy family would find it helpful to have meals prepped in the freezer to whip out for a week night. I work from home two days a week, which helps because when I work in the office I don't have time to cook in the evening. I usually cook on Sundays for the week anyway. So freezer cooking appealed to me because you cook in bulk.

Our Ground rules: Our group decided to exchange frozen meals to serve 5 people in family. The meals should be healthy and if you include meat, it should be locally sourced without antibiotics. The idea is to provide a meal with a side dish or dessert and any add-on items for the pantry. We wrap up the meals in plastic wrap or foil and then freeze for the monthly exchange. The week before, the women add a blog post with their upcoming menu as the RSVP. I decided to make 5 meals to giveaway and 1 meal for ourselves, which I cooked on Sunday night.

My first freezer meal is Sweet Potato-Black Bean Enchiladas with homemade sauce and glazed carrots. I was disappointed with the corn tortillas because many broke open after I rolled them in the pans. But once you put the sauce on top, you won't notice. I make this filling all the time for my own family, but I wanted to make a homemade sauce similar to the one that my family makes.

Enchiladas cooked!
Enchiladas wrapped and ready to go with the sauce and side dishes. I packed shredded cheese separately for the exchange (left unfrozen).
Freezing the meals was interesting! I'm lucky to have another refrigerator in our garage so I could manage the bulk cooking. I cooked the enchilada sauce last Sunday while Ava was playing with Grandma and Grandpa. I stored a quadruple batch of sauce in the fridge all week. For the dried black beans, I had to cook it in the slow cooker in two batches because there were so many beans. I cooked 1 batch on Sunday overnight and the next batch while the slow cooker was still out on Monday while we were at work. Again, I'm glad we had lots of refrigerator space to store all those cooked beans! Then this weekend, I cooked the rest of the filling - sweet potatoes and onions with peppers. Saturday night, I assembled the enchiladas and placed them in the pans to freeze. I portioned the sauce in freezer bags separately because I read from another website that tortillas would be soggy if they were frozen with the sauce. It was helpful to space out the cooking load to several days.

Red Enchilada Sauce (courtesy of Nourishing Traditions by Sally Fallon)
Makes 3 cups 

I quadrupled this recipe to make 6 pans of enchiladas and I still have a couple more servings left with all the sauce. So I froze an extra batch to use later. The sauce is very thick compared to store bought. I couldn't find enough dried chiles for my extra large batch so I used 3 large poblano peppers chopped and cooked them with the onions and garlic.

Ingredients:
4 ounces whole dried New Mexico or Ancho chiles
1/4 cup extra virgin olive oil
1 medium onion, finely chopped
1 tsp ground cumin
2 cups beef or chicken stock
2 cloves garlic, minced
2 small cans of tomato paste
1 tbs red wine vinegar
Sea salt to taste

Preparation:
  • Wearing gloves, clean the dried chiles by removing the stems and seeds. Don't touch your face. Set aside in a bowl.
  • Saute onion in olive oil. Add cumin and cook, stirring constantly, until well amalgamated into the oil. Whisk in garlic, tomato paste and vinegar. Add stock and chiles, bring to a boil. Reduce to a simmer. Simmer covered for about 45 minutes. 
  • Pass the sauce through a food mill or puree in the food processor. Season with salt to taste.
Sweet Potato-Black Bean Enchiladas
Makes 12

Ingredients:
  • 1 cup dried black beans, soaked over night. 
  • 1 sweet potato, chopped in bite-sized pieces
  • 1/2 onion, chopped
  • 2 cloves garlic, minced
  • 1/2 jalapeno pepper
  • Taco seasoning - dried oregano, ground cumin, and chili powder (1 tsp of each)
  • Sea salt (about 1/2 tsp) for the filling
  • 12 corn tortillas
  • 2 cups of red enchilada sauce
  • 1 cup of shredded cheddar cheese for topping
  • Garnish suggestions: sour cream, avocado, chopped fresh cilantro
 Preparation: these can be done ahead of time and stored separately in the refrigerator.
  • Cook soaked black beans in the slow cooker overnight or all day (on LOW for 8-hours). Water should be about 2-inches above the beans. See my blog post on detailed instructions.
  • In a large preheated skillet, add cooking spray or olive oil. Cook onions, peppers, and sweet potatoes on medium-low until the sweet potatoes are tender (about 25 minutes). Add seasoning to the vegetables when you start to saute. 
  • To assemble: Mix black beans with sweet potato-onion mixture and add sea salt. Warm tortillas. Fill corn tortillas with about 3 tablespoons of bean-sweet potato mixture.
  • **If cooking immediately: coat 9x13" casserole dish with cooking spray. Add a few spoonfuls of enchilada sauce to the bottom of the dish. Begin adding enchiladas to the pan. You can fit 8 across vertically and 4 horizontally at the top. 
  • **If freezing, line the casserole dish with plastic wrap. Build enchiladas in the dish in the same format. Freeze sauce in a separate container or bag. When cooking, add defrosted sauce on the bottom of the pan before baking. 
  • Add remaining sauce by spreading evenly on the enchiladas. Sprinkle with shredded cheese.
  • Bake in a 350 degree preheated oven for 45 minutes.
If you have extra filling left, you can squeeze in more enchiladas or save it for a burrito for a quick meal later in the week.

Serve the enchiladas with vegetables or a green salad. Garnish with hot sauce, avocado, fresh cilantro, and sour cream. Let me know what you think!

Sunday, February 5, 2012

Mexican 7 Layer Dip

The Roman Numeral Installation outside of my office building.

Georgia Street – constructed in time for Super Bowl.

Minced black olives make the flavor more evenly distributed.

All 7-Layers complete
Today is Super Bowl Sunday! It's been such a fun time to live in Indy. Aaron and I work on Monument Circle and our company, ExactTarget, has been enjoying the festivities and helping take part in the marketing efforts. We took pictures in front of the roman numeral installation and we had a fun company party last Wednesday. All three of us had fun!

The entire city has been enjoying the Super Bowl Village and NFL experience. The zip line has been the major attraction along with the temporary party tents and outdoor live concerts. The Host Committee has also added breast cancer awareness and even the first ever lactation room in the village. It's been wonderful that they have planned for families!


We're heading to a friend's house to watch the game and I just made Mexican 7-Layer Dip. It's a recipe that my step-mom made when I was growing up for all the pool parties we'd have with the neighbors. I make it in a casserole dish so it serves a crowd. The dip has lots of flavor and the difference is taco seasoning is mixed in the sour cream.


Mexican 7-Layer Dip
Serves a crowd

Ingredients:
  • 1-14oz can refried beans
  • 1-16oz container sour cream
  • 2 cups prepared guacamole
  • 1 small packet of taco seasoning (or use a blend of chili powder, cumin, oregano, and cayenne)
  • 3 tomatoes, diced
  • 3 green onions, thinly sliced
  • 1-14oz can of whole black olives, minced
  • 2 cups shredded cheddar cheese


Preparation:
  • Spread refried beans, guacamole, in the bottom of a 9x13 inch casserole dish. Mix taco seasoning with sour cream and spread on top of the guacamole. 
  • Add diced tomatoes, green onions, olives, and shredded cheddar cheese.
Serve with tortilla chips. The dip is so dense, it works best to offer a serving spoon for guest to scoop out the dip onto their plates. 

It's really easy to make and the dip is always a crowd pleasure!